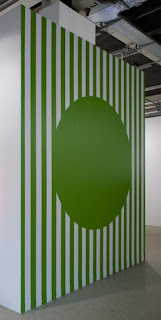
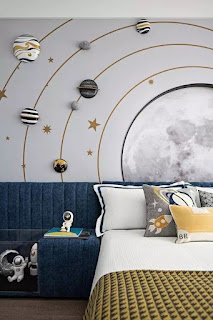
గోడ 3D డిజైన్
3D వాల్ డిజైన్ను రూపొందించడానికి, మీరు SketchUp, AutoCAD లేదా బ్లెండర్ వంటి 3D మోడలింగ్ సాఫ్ట్వేర్ ప్రోగ్రామ్ను ఉపయోగించాల్సి ఉంటుంది. 3D వాల్ డిజైన్ను రూపొందించడానికి మీరు అనుసరించగల సాధారణ దశలు ఇక్కడ ఉన్నాయి:
మీరు సృష్టించాలనుకుంటున్న గోడ డిజైన్ యొక్క 2D డ్రాయింగ్ను సృష్టించడం ద్వారా ప్రారంభించండి. మీరు దీన్ని కాగితంపై చిత్రీకరించవచ్చు లేదా డిజిటల్ డ్రాయింగ్ ప్రోగ్రామ్ను ఉపయోగించవచ్చు.
మీ 2D డిజైన్ను మీ 3D మోడలింగ్ సాఫ్ట్వేర్లోకి దిగుమతి చేయండి మరియు దానిని 3D వస్తువుగా మార్చడానికి ఎక్స్ట్రూడ్ సాధనాన్ని ఉపయోగించండి.
మీ గోడ రూపకల్పనకు ఆకృతి, రంగు మరియు లోతును జోడించడానికి మీ 3D మోడలింగ్ సాఫ్ట్వేర్లోని వివిధ సాధనాలను ఉపయోగించండి.
విభిన్న వాతావరణాలలో మీ డిజైన్ ఎలా ఉంటుందో బాగా అర్థం చేసుకోవడానికి విభిన్న లైటింగ్ సెట్టింగ్లు మరియు కెమెరా యాంగిల్స్తో ప్రయోగం చేయండి.
మీరు మీ డిజైన్ను మరింత ముందుకు తీసుకెళ్లాలనుకుంటే, పూర్తి 3D గది లేదా స్థలాన్ని సృష్టించడానికి మీరు ఫర్నిచర్, ఉపకరణాలు మరియు ఇతర అంశాలను జోడించవచ్చు.
మీరు మీ డిజైన్తో సంతృప్తి చెందిన తర్వాత, మీరు దానిని 3D ఫైల్గా ఎగుమతి చేయవచ్చు మరియు ఇతరులతో భాగస్వామ్యం చేయవచ్చు లేదా భౌతిక నమూనాను రూపొందించడానికి దాన్ని ఉపయోగించవచ్చు.
3D వాల్ డిజైన్ను రూపొందించడం వల్ల నైపుణ్యం సాధించడానికి సమయం మరియు అభ్యాసం పడుతుందని గుర్తుంచుకోండి, కాబట్టి మీరు కోరుకున్న రూపాన్ని సాధించే వరకు ప్రయోగాలు చేయడానికి మరియు కొత్త వాటిని ప్రయత్నించడానికి బయపడకండి.
3డి గోడ డిజైన్ పెయింటింగ్
3D వాల్ డిజైన్ పెయింటింగ్ను రూపొందించడం అనేది గదికి లోతు మరియు ఆసక్తిని జోడించడానికి గొప్ప మార్గం. 3D వాల్ డిజైన్ పెయింటింగ్ను రూపొందించడానికి మీరు అనుసరించగల సాధారణ దశలు ఇక్కడ ఉన్నాయి:
మీరు పెయింట్ చేయాలనుకుంటున్న మీ గదిలో గోడను ఎంచుకోండి మరియు డిజైన్ను నిర్ణయించుకోండి. మీరు ప్రకృతి, రేఖాగణిత ఆకారాలు లేదా నైరూప్య నమూనాలు వంటి వివిధ మూలాల నుండి ప్రేరణ పొందవచ్చు.
కాగితంపై మీ డిజైన్ యొక్క కఠినమైన స్కెచ్ను సృష్టించండి లేదా మరింత వివరణాత్మక ప్రణాళికను రూపొందించడానికి డిజిటల్ డ్రాయింగ్ ప్రోగ్రామ్ను ఉపయోగించండి.
మీ గోడను పూర్తిగా శుభ్రపరచడం ద్వారా మరియు ఏదైనా రంధ్రాలు లేదా పగుళ్లను స్పాకిల్ లేదా జాయింట్ కాంపౌండ్తో పూరించడం ద్వారా దాన్ని సిద్ధం చేయండి. మీ పెయింటింగ్ కోసం మృదువైన ఆధారాన్ని సృష్టించడానికి ఉపరితలాన్ని తేలికగా ఇసుక వేయండి.
మీరు శుభ్రంగా మరియు పెయింట్ లేకుండా ఉంచాలనుకుంటున్న మీ డిజైన్లోని ఏవైనా ప్రాంతాలను గుర్తించడానికి పెయింటర్ టేప్ని ఉపయోగించండి.
మీరు మీ డిజైన్లో ఉండాలనుకుంటున్న రంగులో బేస్ కోట్ పెయింట్ను వర్తించండి. పూర్తిగా ఆరనివ్వండి.
3D ప్రభావాన్ని సృష్టించడానికి స్పాంజింగ్, స్టెన్సిలింగ్ మరియు ఫ్రీహ్యాండ్ పెయింటింగ్ వంటి విభిన్న పెయింటింగ్ పద్ధతుల కలయికను ఉపయోగించండి. లోతు మరియు పరిమాణాన్ని జోడించడానికి మీరు ఒకే రంగు యొక్క విభిన్న షేడ్స్ లేదా విభిన్న రంగులను ఉపయోగించవచ్చు.
మీరు మీ డిజైన్ను పూర్తి చేసిన తర్వాత, పెయింటర్ టేప్ను తీసివేసి, దానికి అవసరమైన ఏవైనా ప్రాంతాలను తాకండి.
స్పష్టమైన కోటు లేదా అలంకార ఫ్రేమ్ వంటి ఏదైనా తుది మెరుగులు దిద్దడానికి ముందు మీ పెయింటింగ్ పూర్తిగా ఆరనివ్వండి.
3D వాల్ డిజైన్ పెయింటింగ్ను రూపొందించడం వల్ల నైపుణ్యం సాధించడానికి సమయం మరియు అభ్యాసం పడుతుందని గుర్తుంచుకోండి, కాబట్టి మీరు కోరుకున్న రూపాన్ని సాధించే వరకు ప్రయోగాలు చేయడానికి మరియు కొత్త పద్ధతులను ప్రయత్నించడానికి బయపడకండి.
wall 3d design
To create a 3D wall design, you will need to use a 3D modeling software program such as SketchUp, AutoCAD, or Blender. Here are the general steps you can follow to create a 3D wall design:
Start by creating a 2D drawing of the wall design you want to create. You can sketch this out on paper or use a digital drawing program.
Import your 2D design into your 3D modeling software and use the extrude tool to turn it into a 3D object.
Use the various tools in your 3D modeling software to add texture, color, and depth to your wall design.
Experiment with different lighting settings and camera angles to get a better sense of how your design will look in different environments.
If you want to take your design further, you can add furniture, accessories, and other elements to create a complete 3D room or space.
Once you're satisfied with your design, you can export it as a 3D file and share it with others or use it to create a physical prototype.
Remember that creating a 3D wall design can take time and practice to master, so don't be afraid to experiment and try new things until you achieve the look you want.
3D wall Design painting
Creating a 3D wall design painting is a great way to add depth and interest to a room. Here are the general steps you can follow to create a 3D wall design painting:
Choose a wall in your room that you want to paint and decide on a design. You can draw inspiration from a variety of sources, such as nature, geometric shapes, or abstract patterns.
Create a rough sketch of your design on paper or use a digital drawing program to create a more detailed plan.
Prep your wall by cleaning it thoroughly and filling in any holes or cracks with spackle or joint compound. Sand the surface lightly to create a smooth base for your painting.
Use painter's tape to mark off any areas of your design that you want to keep clean and free from paint.
Apply a base coat of paint in the color you want your design to be. Let it dry completely.
Use a combination of different painting techniques, such as sponging, stenciling, and freehand painting, to create the 3D effect. You can use different shades of the same color or contrasting colors to add depth and dimension.
Once you've completed your design, remove the painter's tape and touch up any areas that need it.
Let your painting dry completely before adding any finishing touches, such as a clear coat or a decorative frame.
Remember that creating a 3D wall design painting can take time and practice to master, so don't be afraid to experiment and try new techniques until you achieve the look you want.
Cortesy by google


Post a Comment